Showing posts with label Top Note. Show all posts

Friday, 2 September 2011

Button Trees #2


Here's what I came up with, not that much different than the last one!! This one is much smaller, trust me on that! We only had to cut four lots of buttons each not eight!

I made mine in two colours (Elegant Eggplant and Early Espresso) but my ladies only made the purple one. They loved making them and I'm sure they will be making a few more in future.

My thanks have to go to the Artistic Avenger who came up with the idea, check out her blog on the left, she has the most gorgeous projects on there.

And thanks again to my ladies, another lovely evening of craft, what could be better!
Kathy x.


Tuesday, 30 August 2011

Button Tree #1


I made this card after I saw a similar tree made by the Artistic Avenger here. I loved it so much I had to make one for myself!

I started off with a triangle of card, then used my trusty Sweet Buttons embosslit to cut out loads of those gorgeous buttons. I started using the largest buttons first, then worked my way down the sizes, filling in the gaps until the whole triangle was filled. I then cut a trunk out (just a rectangle) and added a ribbon bow made with a large brad.

The card was made up with a Top Note die cut, embossed with the Vintage Wallpaper folder, some swirls cut from a Sizzlit I have. The Swirls Scribbles Sizzlit would work great but I don't have that one, yet! I stuck the tree on top of the Tope note panel, then finished off with a greeting.

I was going to then make a demo out of it for my ladies as I knew they'd love it, but I decided to go smaller for them as I realised we'd be there all night just cutting buttons! lol

So, check out my next post in a couple of days to see what we made.

Thanks for looking,
Kathy x.


Sunday, 7 August 2011

Strength and Hope Workshop


I love this set for 2 reasons, the first is that Strength and Hope has some lovely images, the second is that Stampin' Up! will donate £1 to the Breast Cancer Research Foundation with every set sold.

I first stamped each image onto some Shimmery White card stock using a differnt ink (Pretty in Pink, Rich Razzleberry, Early Espresso and Frost White Shimmer Paint) I then punched out loads of squares.

I repeated the process using Pretty in Pink and Rich Razzleberry card.

When my ladies arrived they made a patchwork of the squares, die cutting it using the Tope Note then embossing it with the Square Lattice embossing folder. A crumpled flower and stamped butterfly were the embellishments.

The second card is a Tope Note easel, simple to make and very effective.

Finally we made the Top Note bag, showing just how versatile that die is, love it!

Thanks for looking,
Kathy x.

Friday, 5 August 2011

Springtime Vintage Workshop


The cards were inspired by fellow Stampin' Up Demonstrator Lisa (check out her blog on the left). She very kindly showed us how to make them at one of Abi's team training events. I love going to team training, we have so much fun, while sharing inspiration and chocolate!

While Lisa used Elegant Soiree DSP (love that paper), I decided to use the Springtime Vintage, teamed with Pocket Silhouettes stamp set.

We also made the cute box using the fantastic Top Note die. I got the instructions on how to make the box while blog hopping one night, but now I can't find the blog to give credit where it's due! So if you know who it was, please let me know so I can say a proper thank you to her.

Thanks for looking,
Kathy x

Wednesday, 3 August 2011

Sail Away Workshop


This workshop was held just in time for Father's Day, so there are a few Dad's who received these.

The card and the canvas background were created using the same technique. Glossy card was used for the card and a water brush was loaded with ink and dragged along the card in long strokes. We used More Mustard then Cajun Craze for the sky and Not Quite Navy for the sea.

Everones card were slightly different as it all depends on your brush strokes and the amount of water/ink used. The sailing boat image was then stamped in Basic Black (waterproof) ink and coloured in using black and Cajun Craze Stampin' Write markers.

The cards were finished off with some nautical charms I found in a local stationery and book shop.

Take care,
Kathy x

Monday, 27 June 2011

Manhattan Flowers Workshop


Here are some of the cards my ladies made last month. I was showing them how to brayer some ink onto the embossing folder & then put the card through the Big Shot to get a fabulous effect. I think they enjoyed learning how versatile embossing folders can be, and how to get very inky fingers!!

Thanks for looking,
Kathy x.


Thursday, 28 April 2011

Build a Blossom #1

As you might have guessed by now, I bought quite a lot from the new mini catalogue! Not quite everything, but a lot!!

One of the things Stampin' Up! does brilliantly is matching stamps and punches and here's a lovely set called Build a Blossom with Blossom Petals punch. These stamps make the most gorgeous flowers a petal at a time.

The flower I created here is very large so I decided from the start that there would only be part of the flower showing, and I love how it turned out!

Thanks for looking,
Kathy. x

Friday, 15 April 2011

Abi's Birthday 2011

Sorry it's been such a long time since I've updated my blog, but life & Blogger have been getting in the way lately. Every time I've had five minutes to update, Blogger hasn't been letting me in.

I've got loads of projects to show you, so if Blogger lets me upload all my photos, you'll have loads to see during the next couple of weeks.

My first offering was made to celebrate my Stampin' Up! Mummy's birthday. Abi is (lots) younger than me but her downline like to call her Mum!!

We share a love of chocolate so I bought a cup of Galaxy chocolate that you just heat in the microwave, they are super yummy (I had to try one or two just to make sure) and added a couple of bars of Galaxy Bubbles, they too are delicious!! lol

I made a simple open top box to hold them, added a piece of floristry film, gathered the ends up and used some retired spotty ribbon to tie it up. The outside of the box was decorated with some Vintage Vogue flowers with pearl centres.

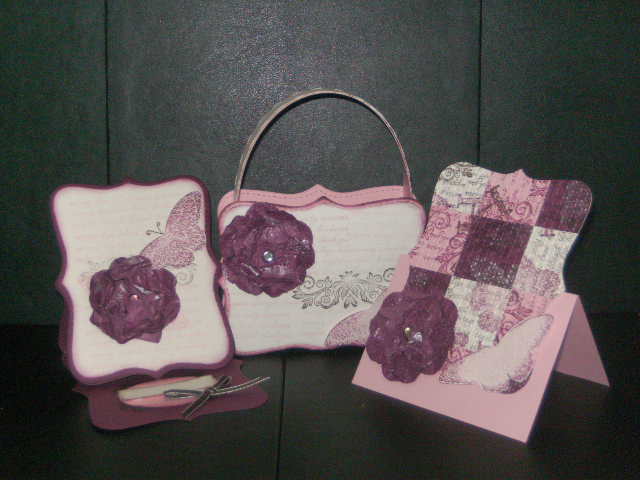
The matching card has a Top Note die cut panel and the greeting panel is the new Four Frames stamp punched out using the matching Decorative Label punch. The top of the card base was stamped using the Very Vintage roller, I didn't want a clean image so I rolled it back and forth a few times.

The colour combination was Soft Suede, Crumb Cake & Pretty in Pink. Hope you enjoyed it, and had a lovely day Abi.

Take Care,
Kathy.x